Comparing Binary Files
Merge binary comparisons provide a way to compare binary (typically non-text and non-image) data files. This is the best type of comparison to use if you wish to see the differences between files at a byte level. Merge can interpret and display the bytes that make up the files in various ways to give, for example, a hexadecimal, decimal or floating-point view of the file data.
If you haven’t already, spending a few moments browsing the Instant Overview of File Comparison and Merging will help you quickly become familiar with Merge file comparisons. It may also be helpful to review the Making the Most of the Ribbon topic.
Performing a comparison
To open a new binary comparison:
- Choose the New binary comparison
 item in the drop-down menu of the leftmost ribbon item.
 - Or, if you are already viewing a binary comparison, click the New binary comparison button in the ribbon.
- Or, press CtrlShiftAltB.
The screenshot below shows a new, empty binary comparison tab.

Two empty areas where the compared files will be displayed take up the majority of the window. Above each file pane is an entry field that you can use to enter the path to a file that you want to compare.
To compare two files, you can type the paths of two files into the entry fields, or use the buttons on the right-hand end of the entry fields to choose files to compare.
The Browse ![]() button opens a file-browsing window and the Show history
button opens a file-browsing window and the Show history ![]() button displays a list of the files that you have recently compared. Double-click a row in the list to load and compare the relevant files. Alternatively, hold Ctrl and double-click a file in the list to load only a single file.
button displays a list of the files that you have recently compared. Double-click a row in the list to load and compare the relevant files. Alternatively, hold Ctrl and double-click a file in the list to load only a single file.
If there are other versions of the file named in the entry field available for comparison in a version control system repository (e.g. a local Git repository), the Versions ![]() button displays a list of these other versions. If this button is not enabled, check the relevant options on the Application and Credentials options pages.
button displays a list of these other versions. If this button is not enabled, check the relevant options on the Application and Credentials options pages.
To perform the comparison once you have chosen the two files to compare, click the Start or recompare ![]() button in the ribbon, or press the Enter key while one of the filename entry fields has focus.
button in the ribbon, or press the Enter key while one of the filename entry fields has focus.
You may also drag and drop files from File Explorer on to the filename entry fields or on to the file panes.
The binary comparison display
Two sample files (test1.txt and test2.txt) are provided in the Merge installation directory. The following screenshot shows the results of a binary file comparison between these two files.
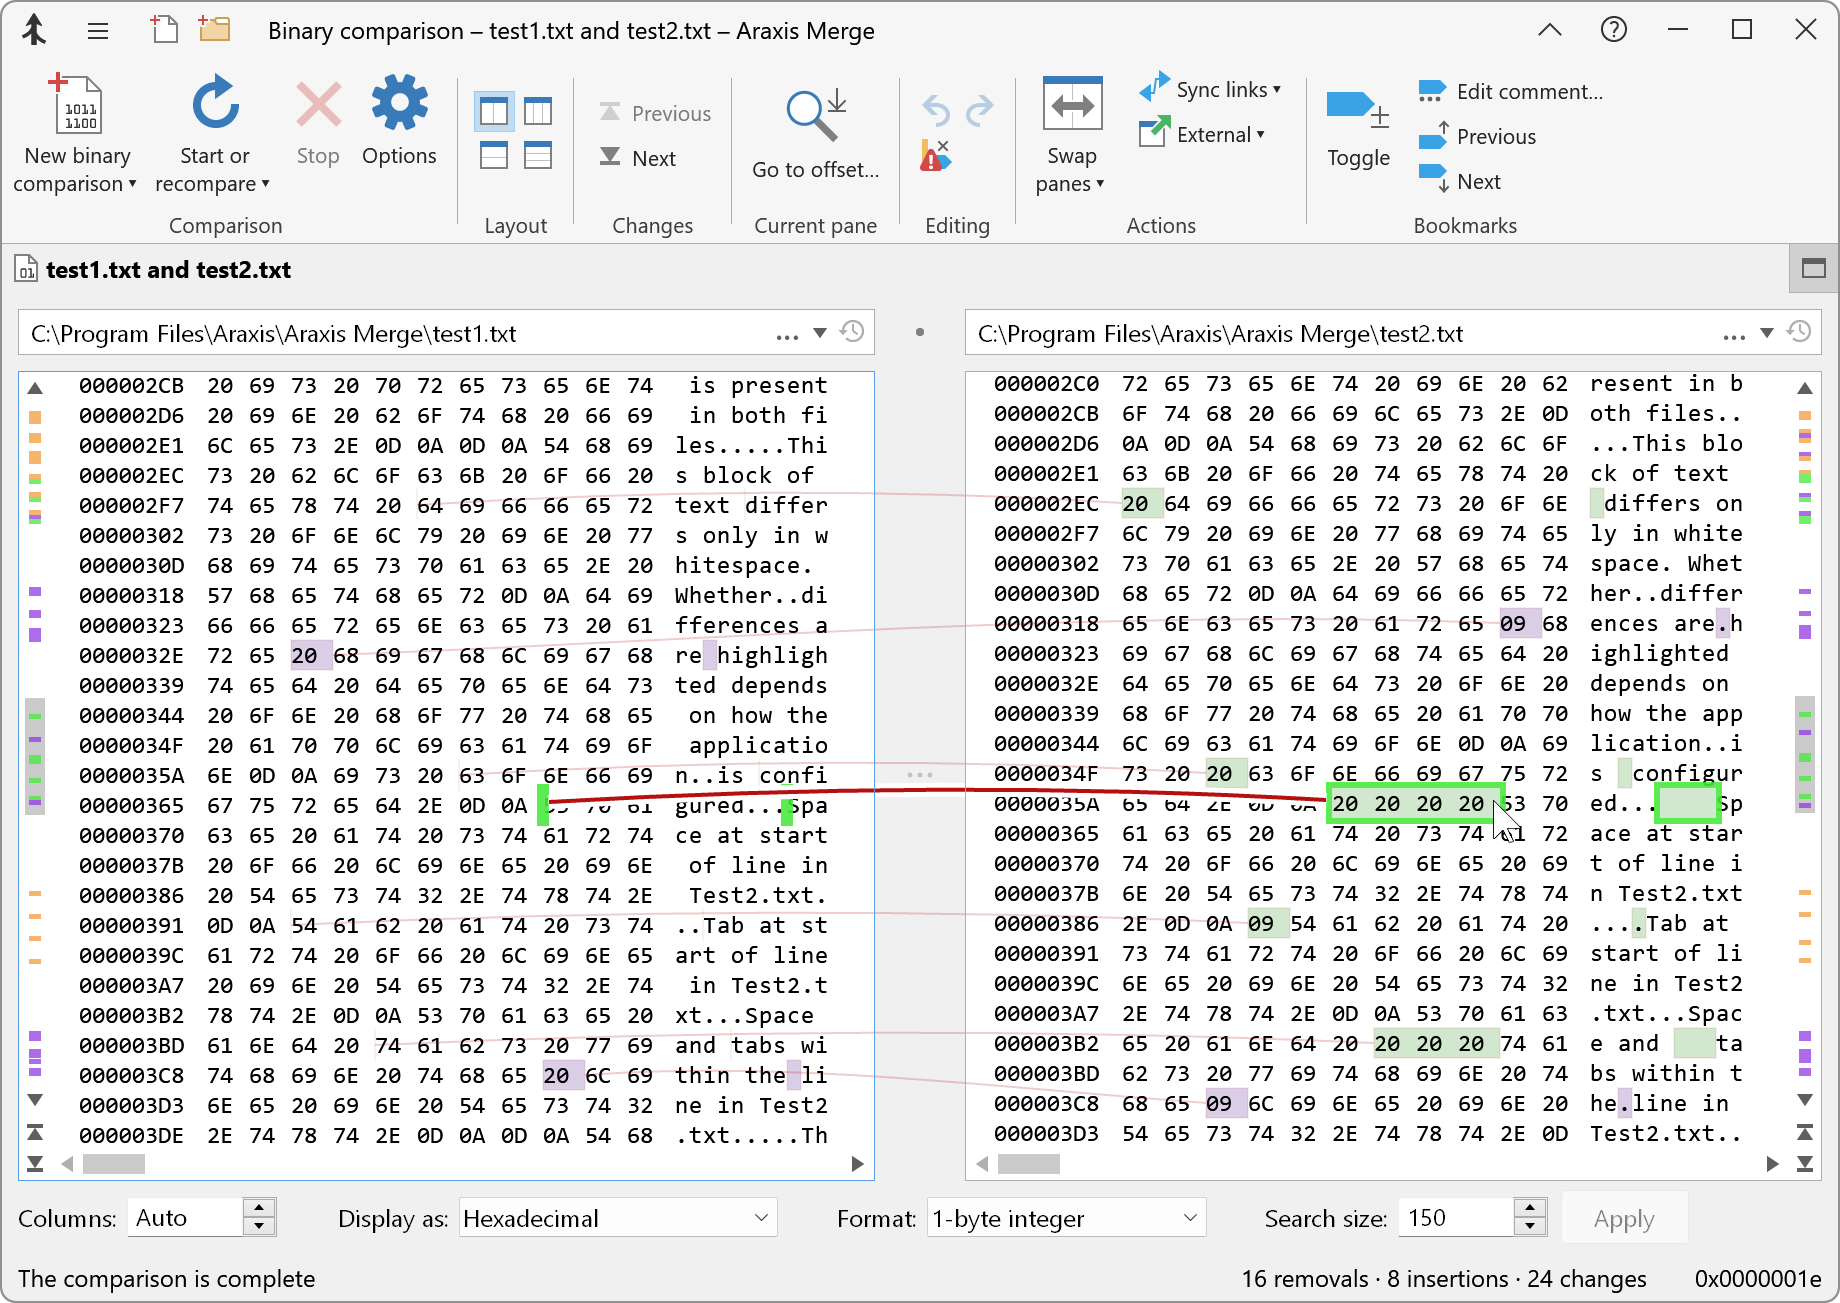
Changes between the two files are highlighted with colours and faint linking lines. The linking lines connect related changes to show exactly how the files are related. If the mouse pointer is hovered over a change, that change and its linking line are highlighted. Similarly, a change will be highlighted if a file panel is focused and the text cursor in that panel is positioned within that change.
You can modify the colours and fonts used in the comparison window by using the controls on the Fonts and Colours options page.
A summary of the number of changes that were found between the compared files is shown in the status bar at the bottom of the main Merge application window. The byte offset of the text cursor in the last-focused file panel is also displayed.
Layout controls
You can use the Two-way (horizontal) ![]() or Two-way (vertical)
or Two-way (vertical) ![]() buttons in the ribbon (or the F11 and F12 keys) to change the layout of the files within the file comparison window so that the compared files are displayed one above the other or side-by-side (the default).
buttons in the ribbon (or the F11 and F12 keys) to change the layout of the files within the file comparison window so that the compared files are displayed one above the other or side-by-side (the default).
There are many options that you can set to customize how Merge compares and displays files. There are help topics that will enable you learn how to customize Merge so that it produces the best results for you.
Three-way file comparisons
In addition to two-way file comparison, the Professional Edition of Merge enables you to compare (and, for text files, merge) three files. Please see the Three-Way File Comparison and Merging topic for more information. The Professional Edition also supports the automatic merging of text files.
Binary comparison controls
You can change how the binary comparison is performed and displayed using the controls in the strip along the bottom of the binary comparison window.
Columns
This control determines the number of columns of data elements shown in the file panels. A value of 0 or Auto will cause as many columns as will fit to be shown.
Display as
Use the values in this drop-down list to choose a display style for the data shown in the comparison. You can view the data in hexadecimal or decimal (big or little endian) or as floating point values. Some display values are only appropriate for certain choices in the Format drop-down (for example, displaying as Floating Point doesn’t make sense for a 2-byte Integer format). The comparison display will show NaN (not a number) if the comparison format isn’t suitable for the selected Display as choice.
Format
Use this drop-down list to choose the size and type of data elements in the compared files. You can choose to format the data as 1, 2, 4 or 8-byte integers, or 32-bit or 64-bit floating point values. The default element size is a byte. Click the Apply button to apply changes to this control.
Search size
This value determines the amount of work Merge will perform to find a minimal set of changes between the compared files. Its effect is greater on large files. Smaller values typically result in quicker comparisons at the expense of accuracy; larger values result in slower comparisons with greater accuracy.
Although smaller search sizes will never miss a change, they may not give you the optimal set of changes.
Click the Apply button to apply changes to this control.
Navigation
As you scroll one file up and down using its scroll bar, the other file is scrolled so that the two files remain aligned in the centre of the display. The centre-point marker (a line of small indentations in the centre of the linking-lines panel) indicates the point at which Merge tries to keep related parts of the files aligned. You can temporarily prevent Merge from keeping both files aligned by holding down the Ctrl key while scrolling. When you release Ctrl, the files will snap back into alignment.
The small Previous change ![]() and Next change
and Next change ![]() buttons below the scroll bars can be used to jump to the previous or next change relative to the centre-point marker.
buttons below the scroll bars can be used to jump to the previous or next change relative to the centre-point marker.
![]() There are thin overview strips within the vertical scroll bars of the left and right panes. These contain markings to indicate the position of changes within the compared files. You can quickly navigate to a change by holding down the Shift key and clicking on the marks in the strip.
There are thin overview strips within the vertical scroll bars of the left and right panes. These contain markings to indicate the position of changes within the compared files. You can quickly navigate to a change by holding down the Shift key and clicking on the marks in the strip.
You can use the cursor keys to navigate within a file after clicking within it to give it keyboard focus. The following navigation shortcut keys are also available:
- CtrlPage Up (or F7) moves the editing cursor to the previous change and highlights that change.
- CtrlPage Down (or F8) moves the editing cursor to the next change and highlights that change.
- CtrlHome and CtrlEnd moves the editing cursor to the beginning or end of the file.
- CtrlG displays a window that you can use to navigate to a specific byte offset.
For a full list of keyboard shortcuts, see File Comparison Keyboard Shortcuts.
Mouse navigation
Merge supports mice with wheels. If you have a three-button mouse, you can click within a file panel with the middle mouse button to enter a panning mode. The file will scroll in the direction you move the mouse. To stop panning, click the middle mouse button again. If your mouse has a wheel, you can use it to scroll up and down within the active file. If your mouse or keyboard has backwards and forwards buttons, you can use them to navigate to the previous or next change.
Bookmarks and comments
As you are comparing or editing files, you may wish to set bookmarks to enable you to return to locations of interest later on. Press CtrlF2, or click Toggle bookmark ![]() in the ribbon, to toggle a bookmark on or off on the current line. To navigate between bookmarks, press F2 or Shift+F2, or use the Next bookmark
in the ribbon, to toggle a bookmark on or off on the current line. To navigate between bookmarks, press F2 or Shift+F2, or use the Next bookmark ![]() and Previous bookmark
and Previous bookmark ![]() buttons in the ribbon.
buttons in the ribbon.
Comments can be added to bookmarks, making it easy to note important information or to record a question. To edit a bookmark’s comment, right-click the bookmark and choose the Edit Comment menu item. Bookmark comments are shown as tooltips when you hover the mouse pointer over a bookmark.
Bookmarks and comments are included when you create an HTML comparison report or save a comparison for archival or team collaboration. They are therefore a useful tool for asking questions or making notes in a comparison that will later be emailed to other team members for review.