Automatic File Merging
The Professional Edition of Merge has the ability to automatically merge two modified files into a common ancestor. A typical merging scenario is where two developers have independently made modifications to a source file stored in a configuration management system and changes in the two modified files need to be reviewed and merged together.
The Professional Edition of Merge also features Automatic Folder Merging, making it possible to perform a quick three-way merge of entire source trees.
Starting an automatic merge
Automatic merging works only with three-way file comparisons. The common ancestor file should be loaded into the central file panel and the two newer (modified) files into the left and right panels. You should ensure that the common ancestor folder is the one in the centre of the folder comparison window if you are using a three-way folder comparison window to launch file comparison windows.
Use the Merge to common ancestor ![]() button in the ribbon to start an automatic merge.
button in the ribbon to start an automatic merge.
How automatic merging works
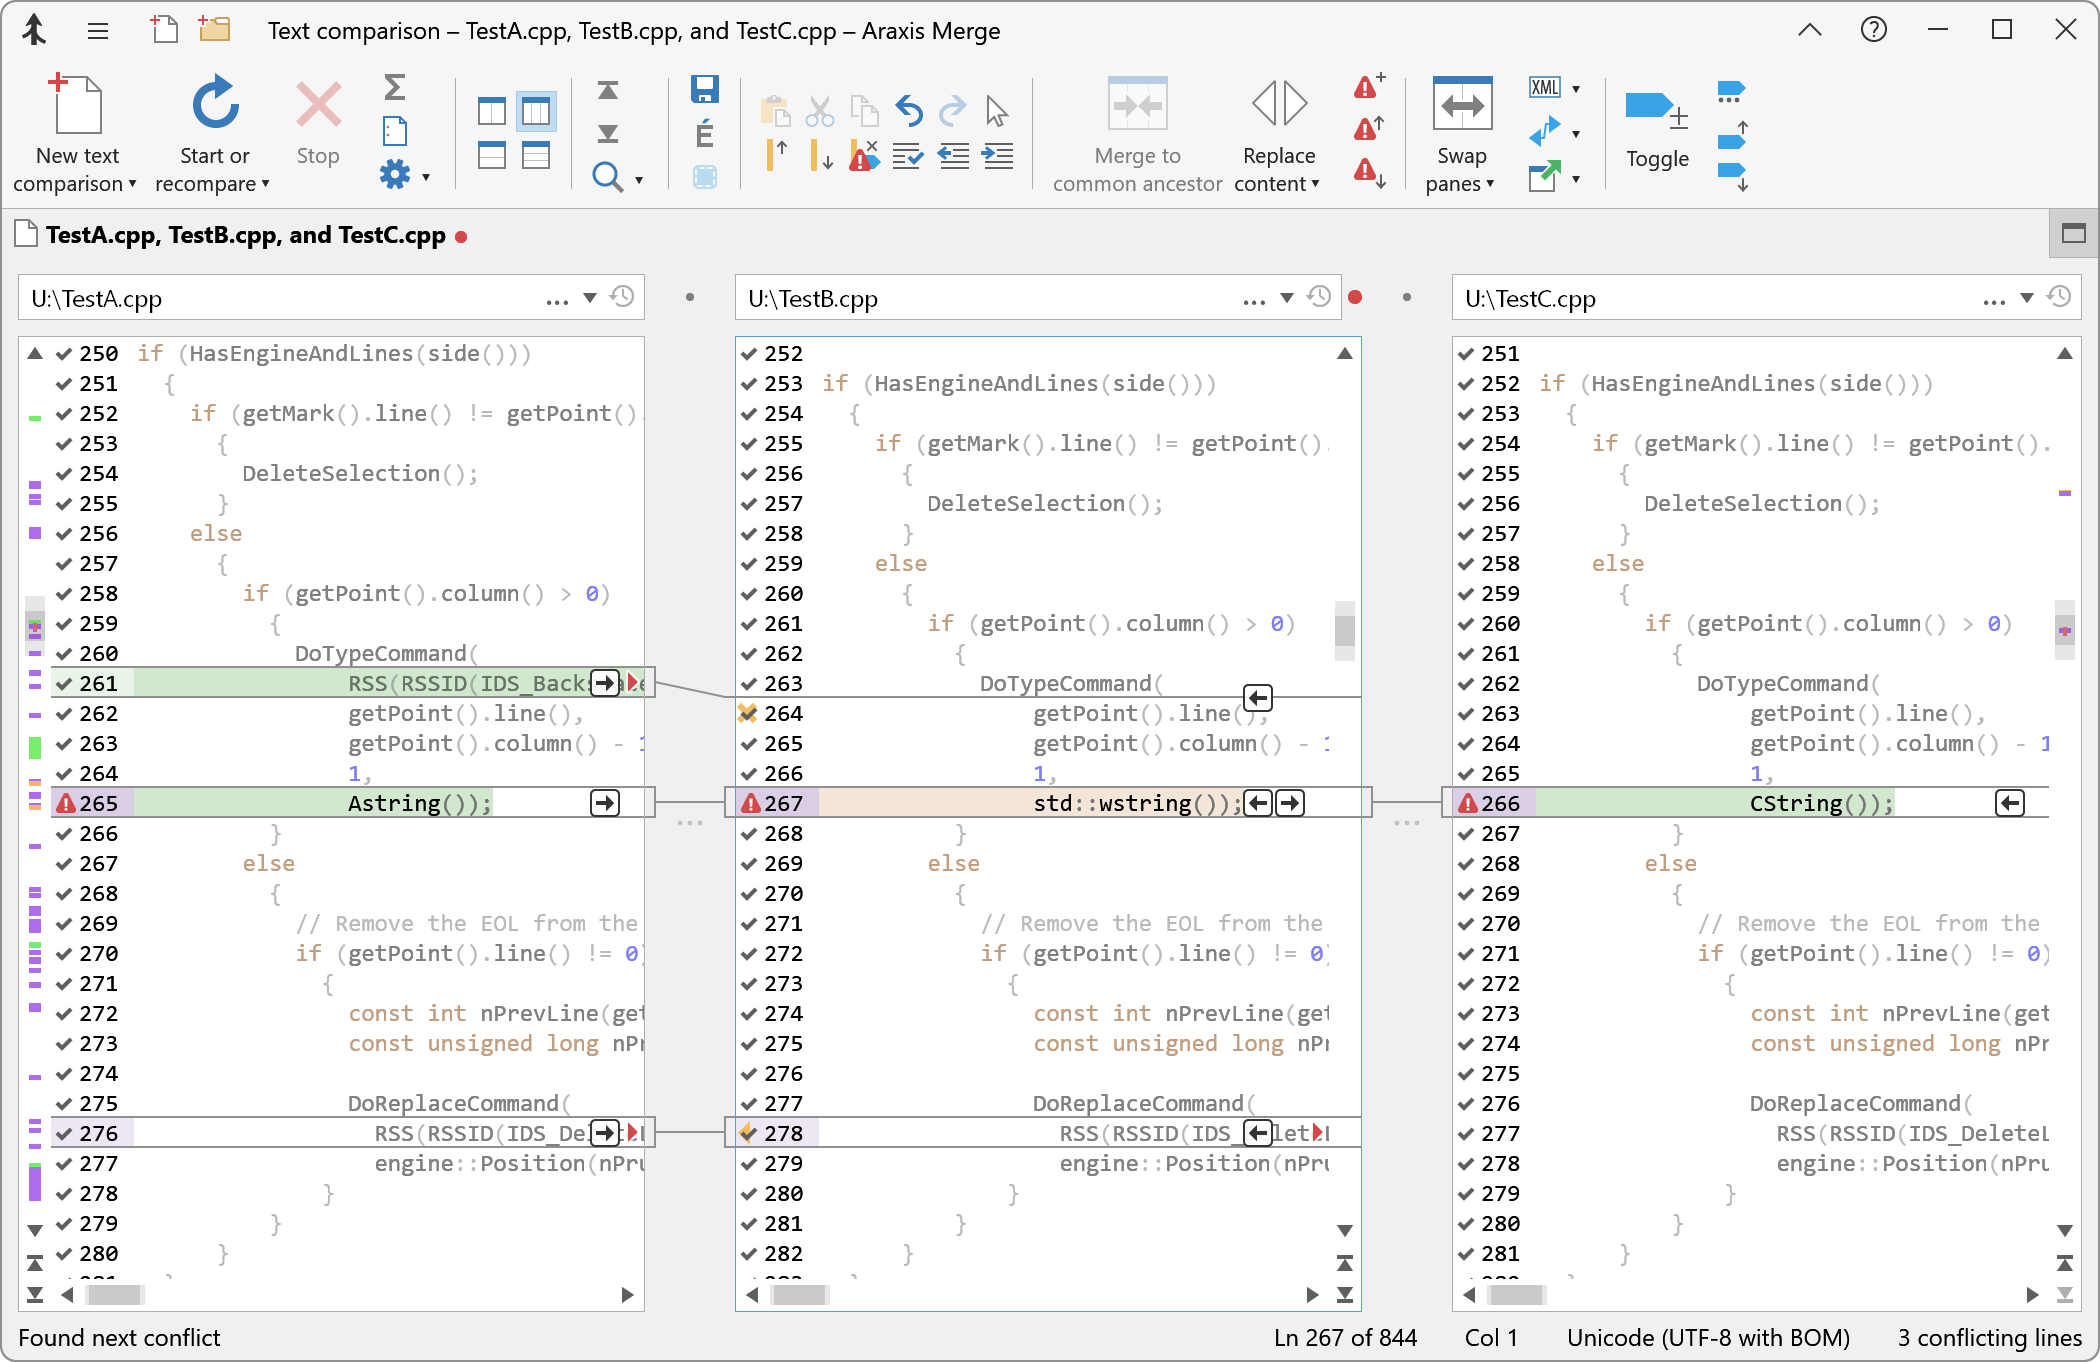
When an automatic merge is started, Merge will examine the three files starting at the top, working down. Each change between the three files is examined to determine whether it should be retained in, or added to, the final merged file. Merge may be unable to decide what to do with certain types of change and will mark them as conflicts that require attention from you.
When the merge is complete, the central file panel will contain the resolved (merged) file. This is therefore the file that you should save once you are happy with the merge results. The left and right-hand files are not modified by the three-way merge command.
Simple rules control how changes in the two modified files are merged into the common ancestor. Since the two modified files are assumed to be more recent than the common ancestor, changes (inserted, removed, or edited blocks of lines) to the files are applied into the common ancestor unless changes to the two modified files overlap.
Understanding automatic merge results
Changes that overlap or touch at their start or end are marked as conflicts. A red conflict icon ![]() is shown at the beginning of each line within a change that could not be automatically merged.
is shown at the beginning of each line within a change that could not be automatically merged.
You can navigate between conflicts by using the and Next conflict ![]() buttons in the ribbon.
buttons in the ribbon.
To navigate between conflicts:
- click the Previous conflict
 and Next conflict
  toolbar buttons;
 - or, press Ctrl9 and Ctrl0 (zero).
There are some types of overlapping change that do not result in a conflict. If the change is the same in the modified files (for example, the same lines were added/removed/changed, and their content is exactly the same) then the change is merged into the common ancestor. Merge always treats whitespace as significant when deciding whether to automatically merge a particular change. Thus, if a change appears identical in the modified files but Merge has marked it as a conflict, it is likely that there is a difference in whitespace or line endings between the two modified files.
Marking of changes made to the common ancestor file
Every change that is made to the common ancestor is flagged with an edit marker indicating the nature of the change:
- For lines introduced into the common ancestor, an arrow (
 or
or  ) indicates the file from which the lines were copied.
 - For lines removed from the common ancestor, a delete marker
 is placed on the line after the position from which the lines were removed.
 - Lines that have been manually edited are marked with
 .
.
Each ![]() ,
, ![]() , or
, or ![]() marker has an associated tooltip that explains what edit was made. Hold the mouse cursor over the marker for a few seconds to see the explanation. Conflict markers
marker has an associated tooltip that explains what edit was made. Hold the mouse cursor over the marker for a few seconds to see the explanation. Conflict markers ![]() also have a tooltip to explain the reason for the conflict.
also have a tooltip to explain the reason for the conflict.
To navigate between edit markers:
- click the Previous edit
 and Next edit
  ribbon buttons;
 - or, press Ctrl7 and Ctrl8.
Dimming of resolved lines
As Merge resolves the changes between the two modified files into the common ancestor, the resolved lines are dimmed to indicate that they have been finished with. When the three-way merge is complete, only lines within conflicting changes will retain their original colours. The amount of dimming applied to resolved lines is controlled by the Dim resolved text by option on the Fonts and Colours options page.
Resolving conflicts
After performing an automatic merge, you should manually resolve any conflicting changes that were flagged. You should also check that the changes that have been made automatically to the common ancestor are valid. Finally, you may need to adjust the indentation of some of the merged changes.
Previewing an automatic merge
Because automatic merging can be undone, it is safe to try an automatic merge to see what it will do. If you are unhappy with the automatic merge results, use the Undo ![]() button in the ribbon to reverse the automatic merge.
button in the ribbon to reverse the automatic merge.
Previewing an automatic merge is a useful way of quickly highlighting the conflicting sections of the files being compared. Using the Mark conflicts ![]() ribbon button, it is also possible to mark potential merging conflicts without first performing an automatic merge.
ribbon button, it is also possible to mark potential merging conflicts without first performing an automatic merge.
Clearing markers and text dimming
Following a three-way merge operation, you can remove all of the edit/conflict markers and text dimming by using the Clear all markers ![]() button in the ribbon. This will also clear any bookmarks you may have set.
button in the ribbon. This will also clear any bookmarks you may have set.
At any time you can mark the current selection or line as resolved by using the Mark resolved ![]() button in the ribbon. This will remove any conflict markers on lines within the selection and cause it to be dimmed. If there is no selection, the operation is applied to the current line.
button in the ribbon. This will remove any conflict markers on lines within the selection and cause it to be dimmed. If there is no selection, the operation is applied to the current line.